Guide: How to bypass a BIOS password on a ThinkPad X131e
I recently picked up a broken ThinkPad X131e off of eBay for just £30, and it was honestly quite a bargain given it was broken. Why? The seller said the issue was that there was a BIOS password that they couldn't get past. Given the age of this laptop, this should be a fairly straightforward task, right?
Well, that's what I originally thought... But the process can be a little scary if you haven't cracked open many laptops before.
So, if you've picked up any old ThinkPad with a BIOS lock on it, this guide should help you figure out how to not only bypass, but also reset it.
Step 0 - What's the problem?
It's very common that ThinkPads are bought in bulk by corporations as work laptops, so they're built with serious security measures a lot of the time. This especially applies to the BIOS. As such, ThinkPads can be set up to have what's called a "Supervisor Password", which is essentially the password that allows access to all BIOS settings. This is great, unless you're using the laptop second-hand.
On older ThinkPads, this security is handled by a small EEPROM chip with the label "L08", and bypassing the password can be done by just shorting two adjacent pins. The location of this chip varies by motherboard.
Step 1 - Locating the Chip
Little-to-no documentation exists on the X131e, so I was stuck in the dark finding the location of this chip, but I did find it. Of course, this was after tearing down the whole unit, twice.
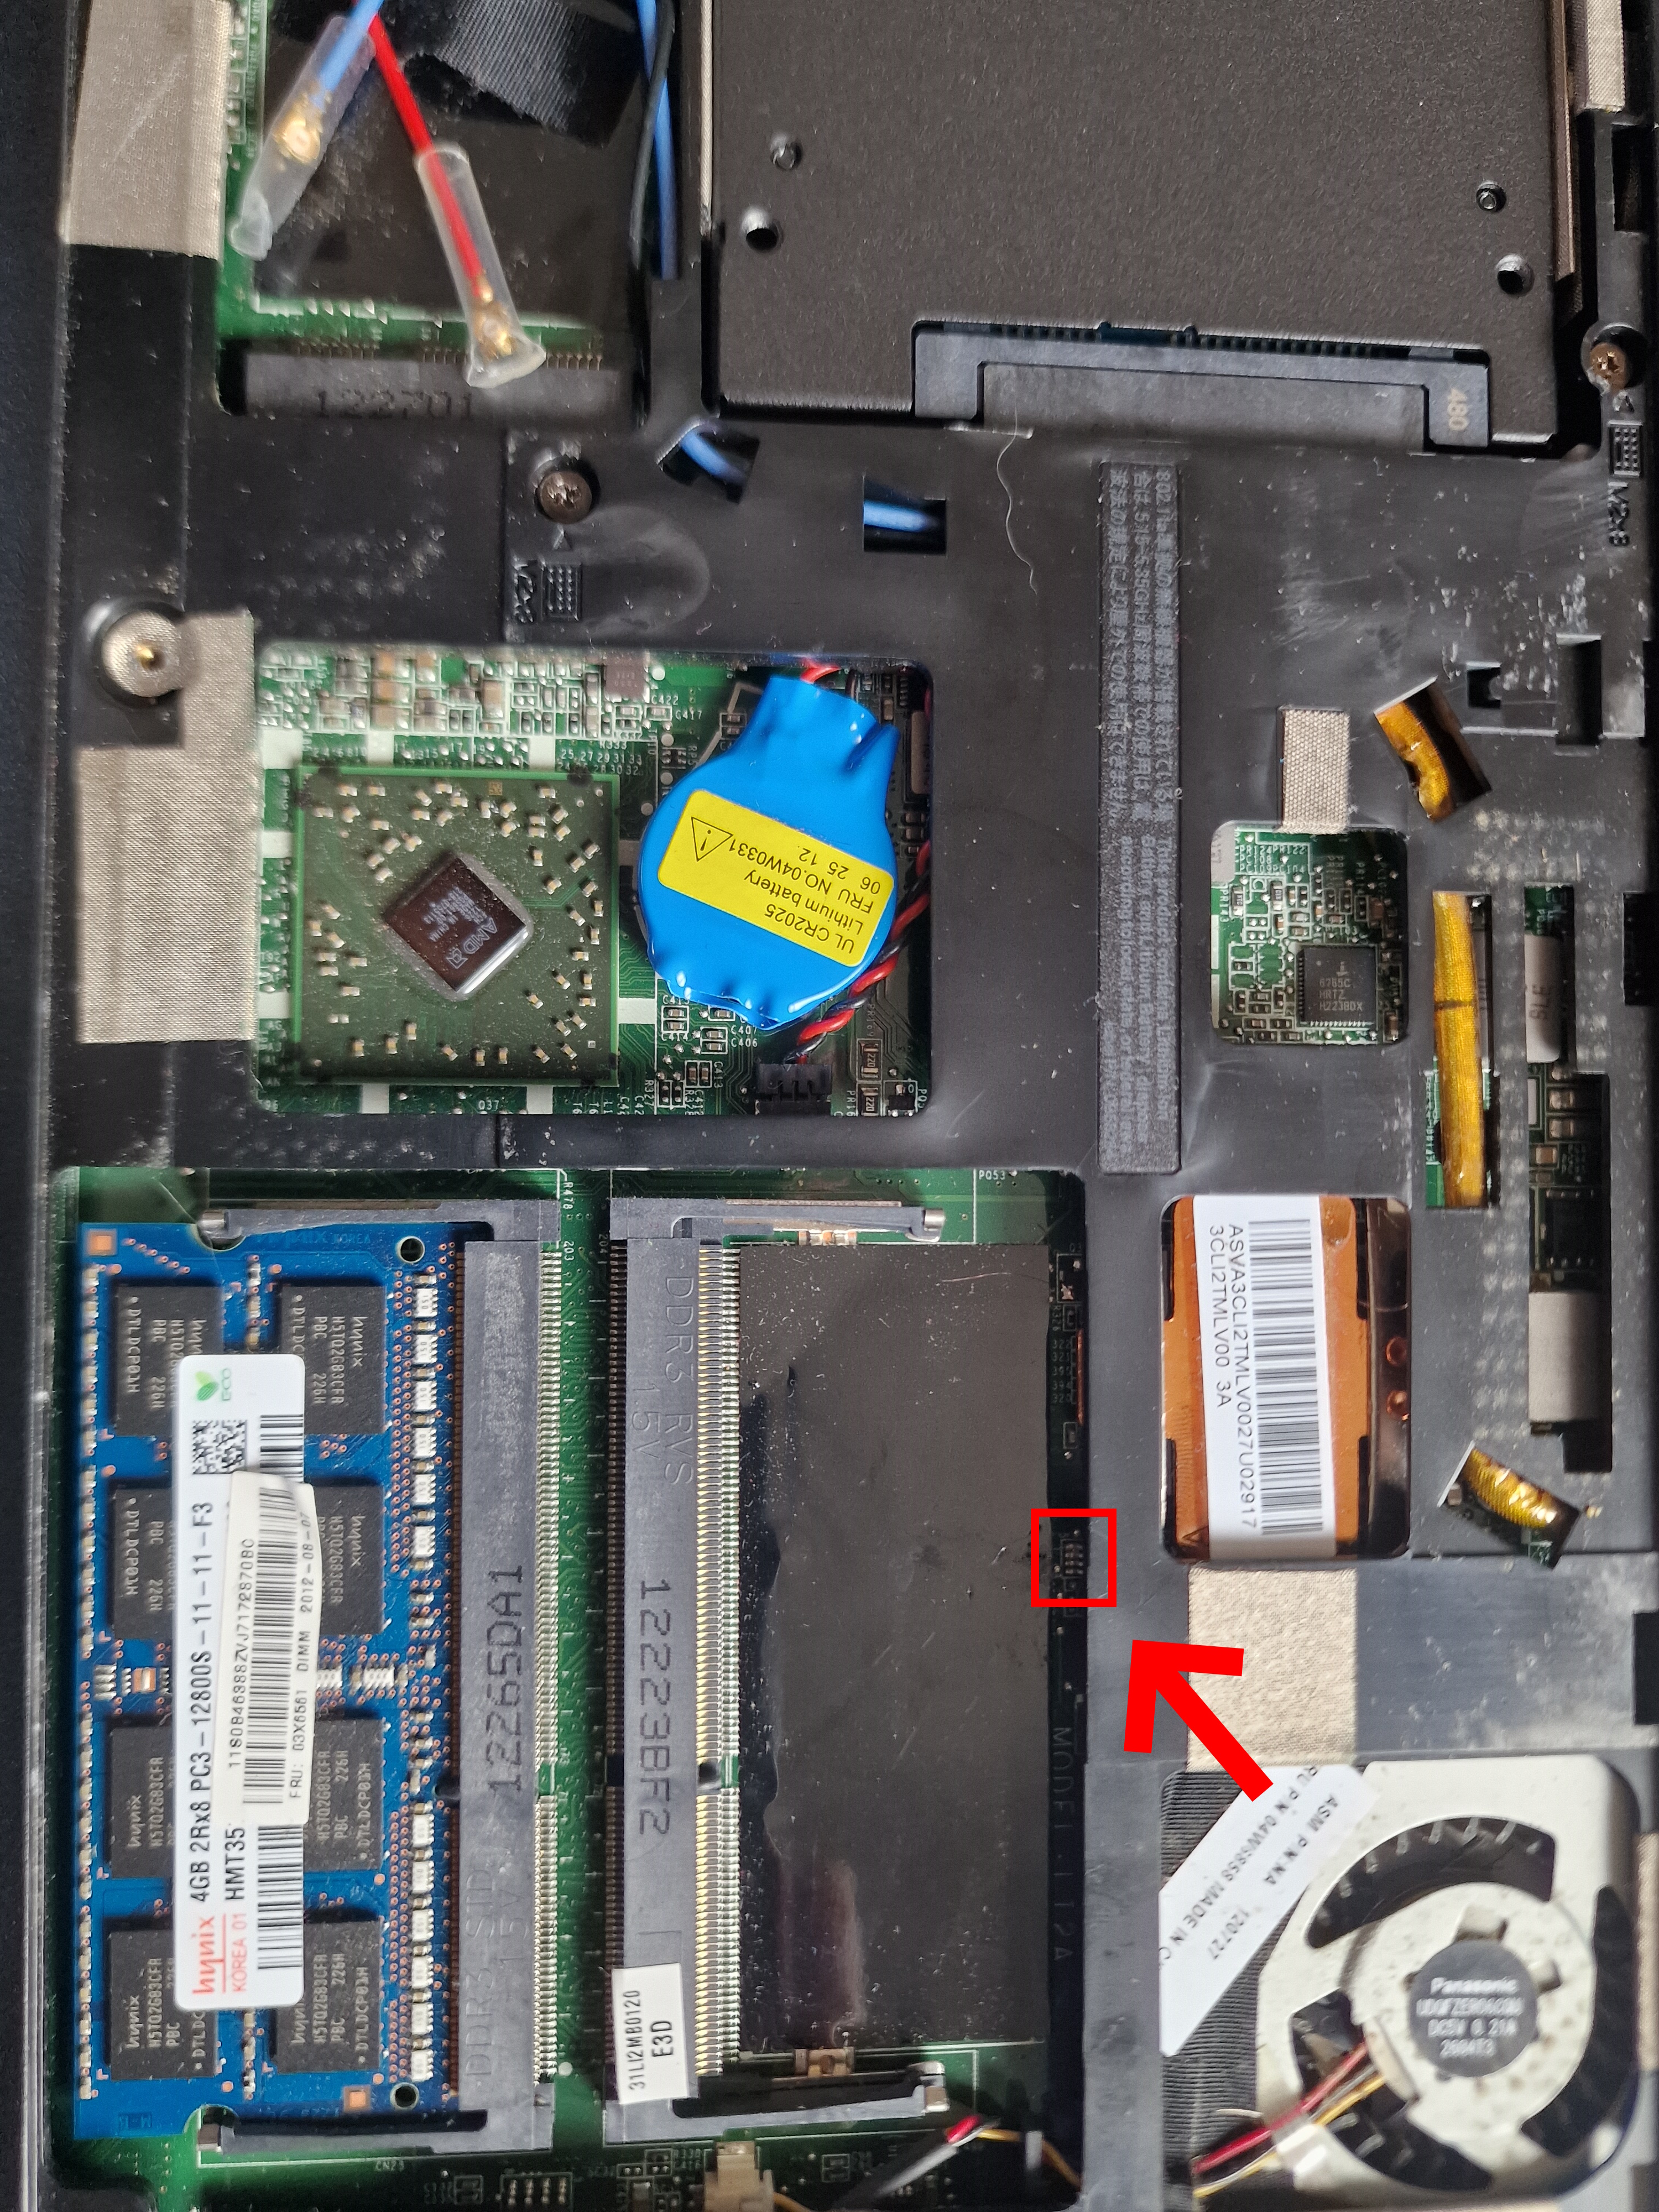
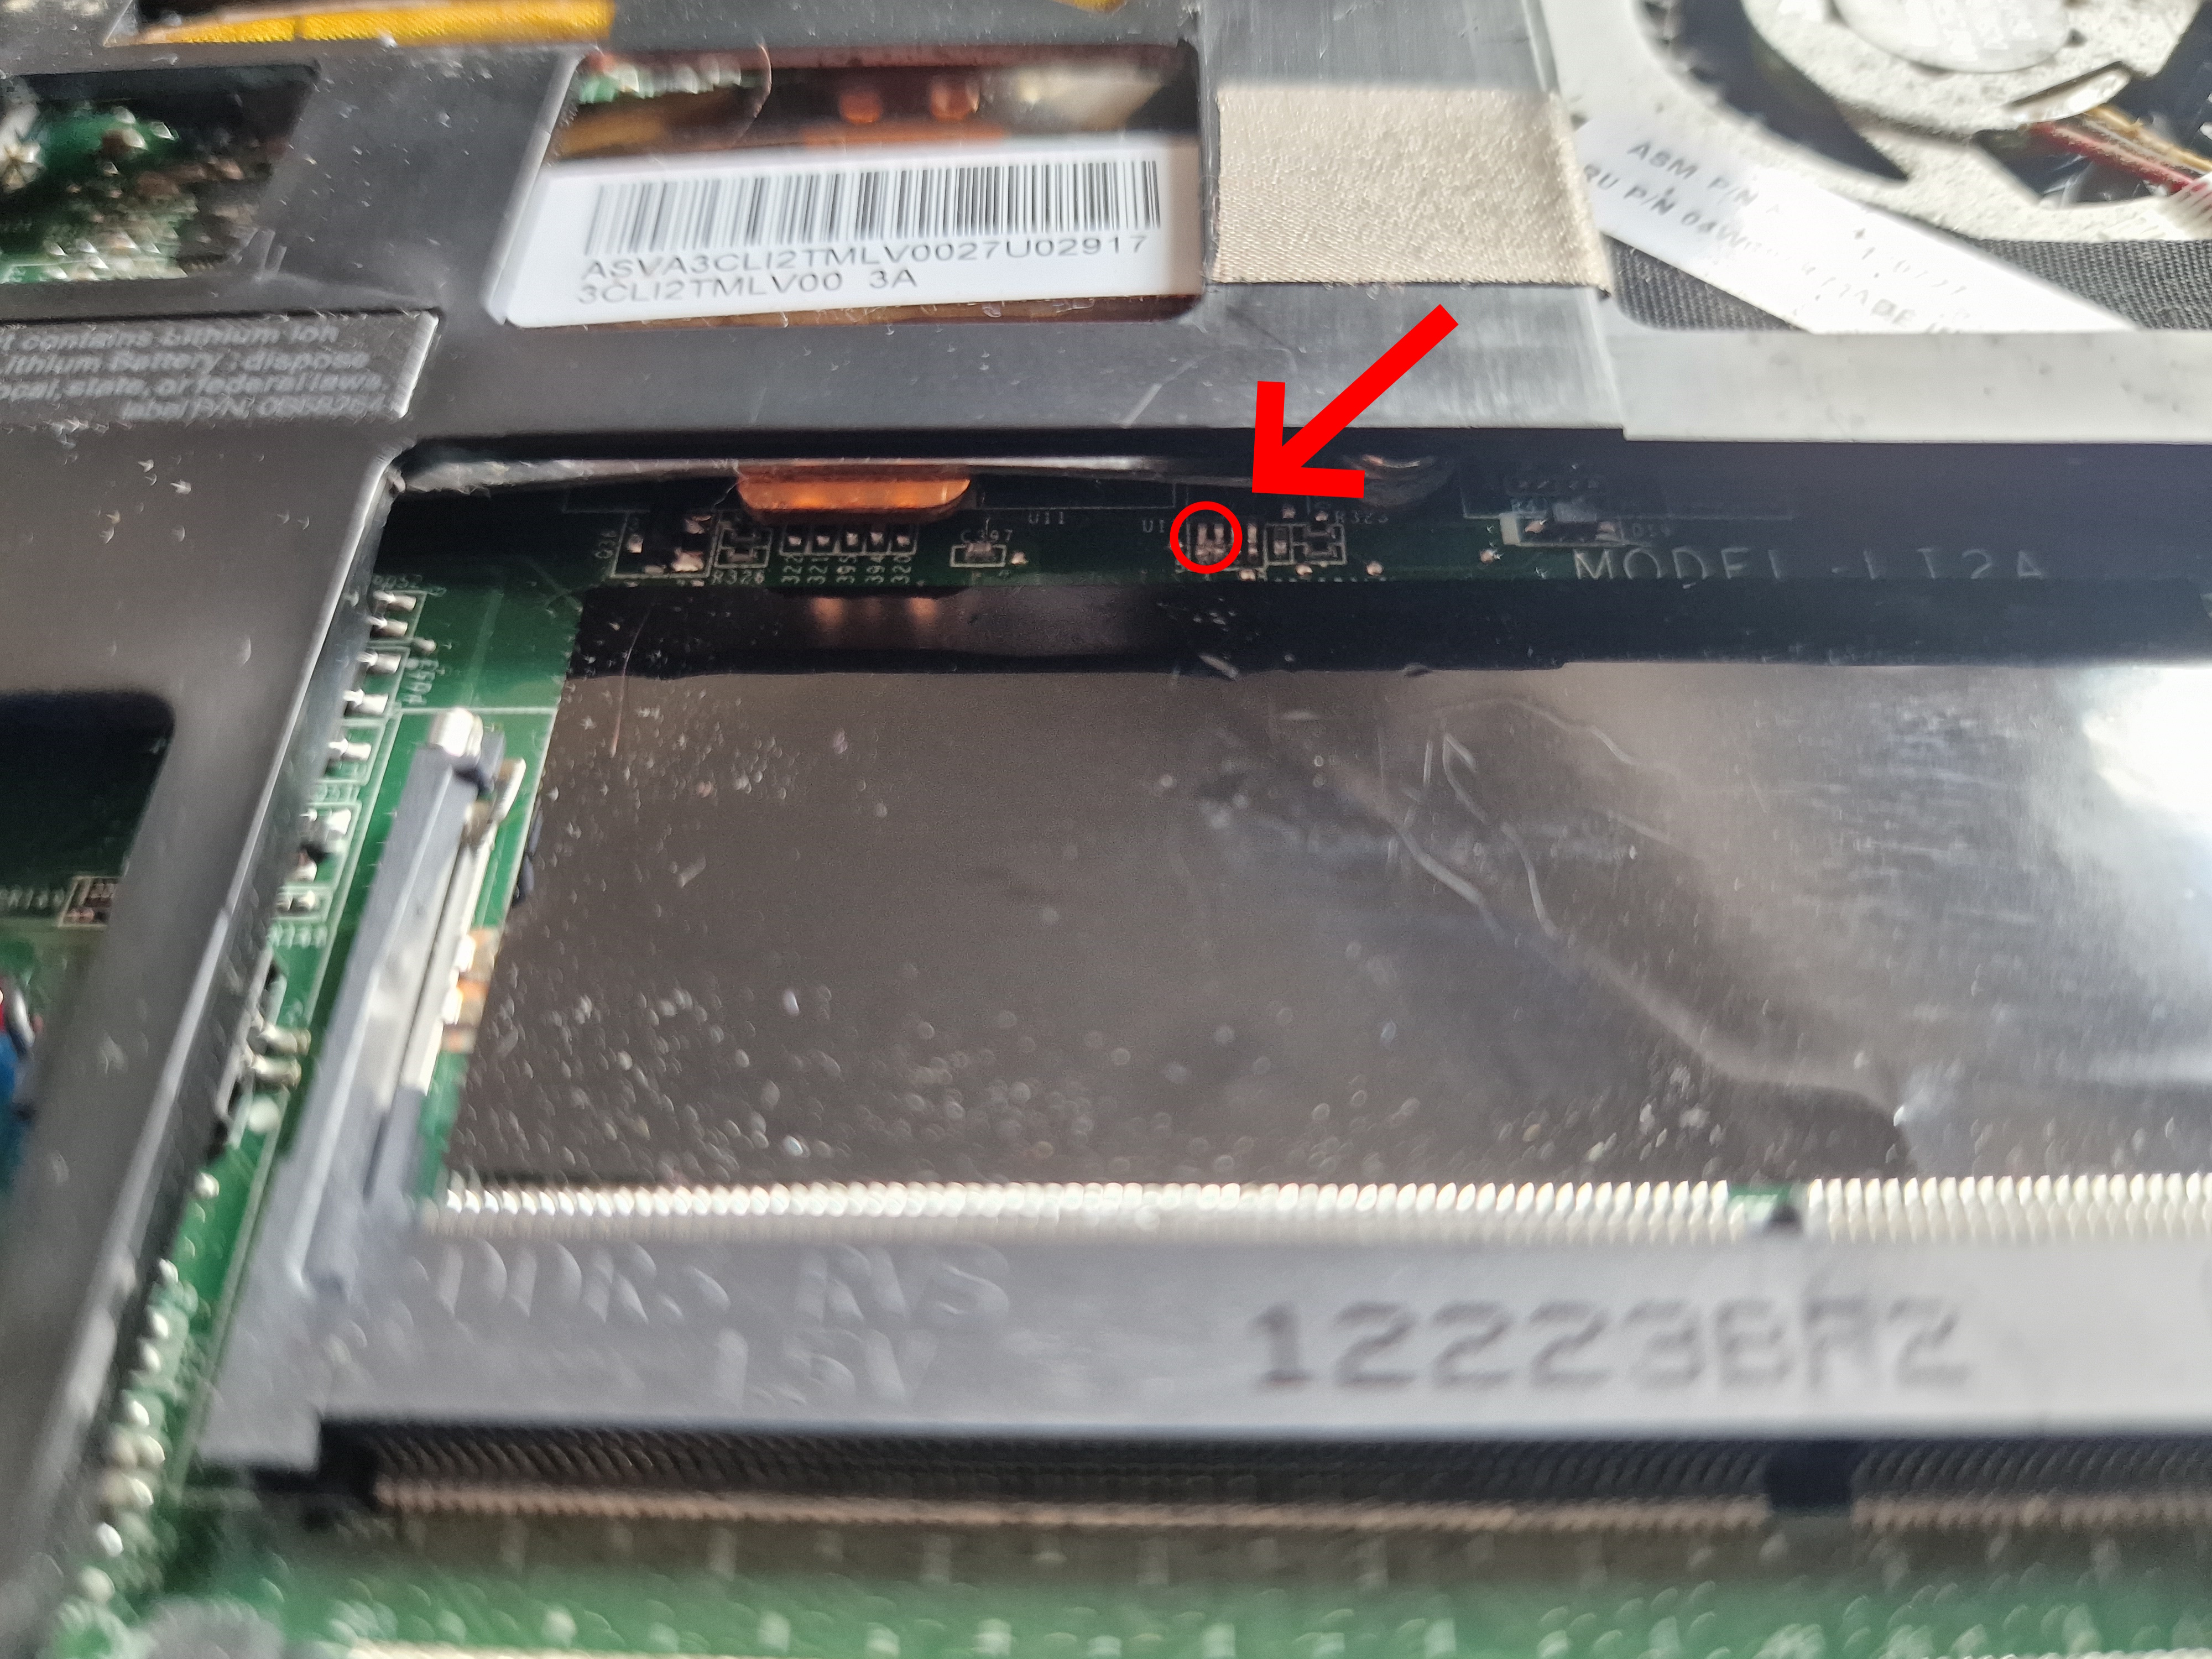
It turns out, the L08 resides right below the CPU, just above the RAM sockets. You don't even need to take the motherboard out of the computer, just take the backplate off and you'll see it.

Step 2 - Shorting the Chip
As mentioned before, shorting the chip is very easy to do. The two pins are the SCL and SDA pins, which are next to each other, and are on the opposite corner of Pin 0, denoted by the circle. Below the two pins on the X131e are highlighted.

Because the chip is so small, you can use something like a needle or the end of a paperclip to short the pins.
Now, to bypass the security, first turn on the laptop, then, once you see the ThinkPad boot screen (the one that prompts you to press enter to get to the BIOS), short the two pins and press Enter to get into the BIOS (spamming is optional). From this point onwards make sure the pins remain shorted!
Note - If you short the pins too early, you'll get a blank screen and beep code 1-3-3-1. If you short them too late, the computer will either boot as normal, or you will be prompted to enter the password. In either scenario, restart the computer and try again. It will likely take a few attempts!
Step 3 - Removing the Lock
Enter into the BIOS and go straight to the Security tab. Go down to "Passwords" and select "Supervisor Password". Press Enter twice to remove the password, then once again to acknowledge the prompt. Feel free to tweak any other settings, then save your settings and exit
You're now done! You can stop shorting the pins and replace the back cover of the laptop.
I did some other cool things with this laptop, check out this blog post!